Redirecting a Ghost blog domain with Let'sEncrypt SSL


Running your own Ghost blog is generally a pretty frictionless experience. I love how easy it is to get set up and how little effort is required from there on in.
The Ghost CLI tool has you covered for quick config changes, updates and the like - but it starts to fall short when you want to make more complex configuration changes (and perhaps fairly so - most are out of scope for the average user).
As a result, I've been putting off sorting out the www to non-www redirect on this site for a little while, particularly with LetsEncrypt making things slightly more complex (i.e. your SSL cert for myname.com will not work for www.myname.com).
Turns out, it's a 5/10 minute job. Here's how to do it.

Pointing your Domain
If you asked most people, they might think that the www prefix was an integral part of the way the internet works (they wouldn't be entirely wrong historically), something that every website magically has - that's just how ubiquitous the prefix is. In reality it's nothing more than a particularly popular sub-domain - one which is decreasingly popular but still likely to be habitually typed in by users trying to access your website.
As such it's important to make sure you support both www.yourdomain.com and yourdomain.com. It's entirely up to you which one you prefer but it's best for SEO reasons to pick one and redirect the other.
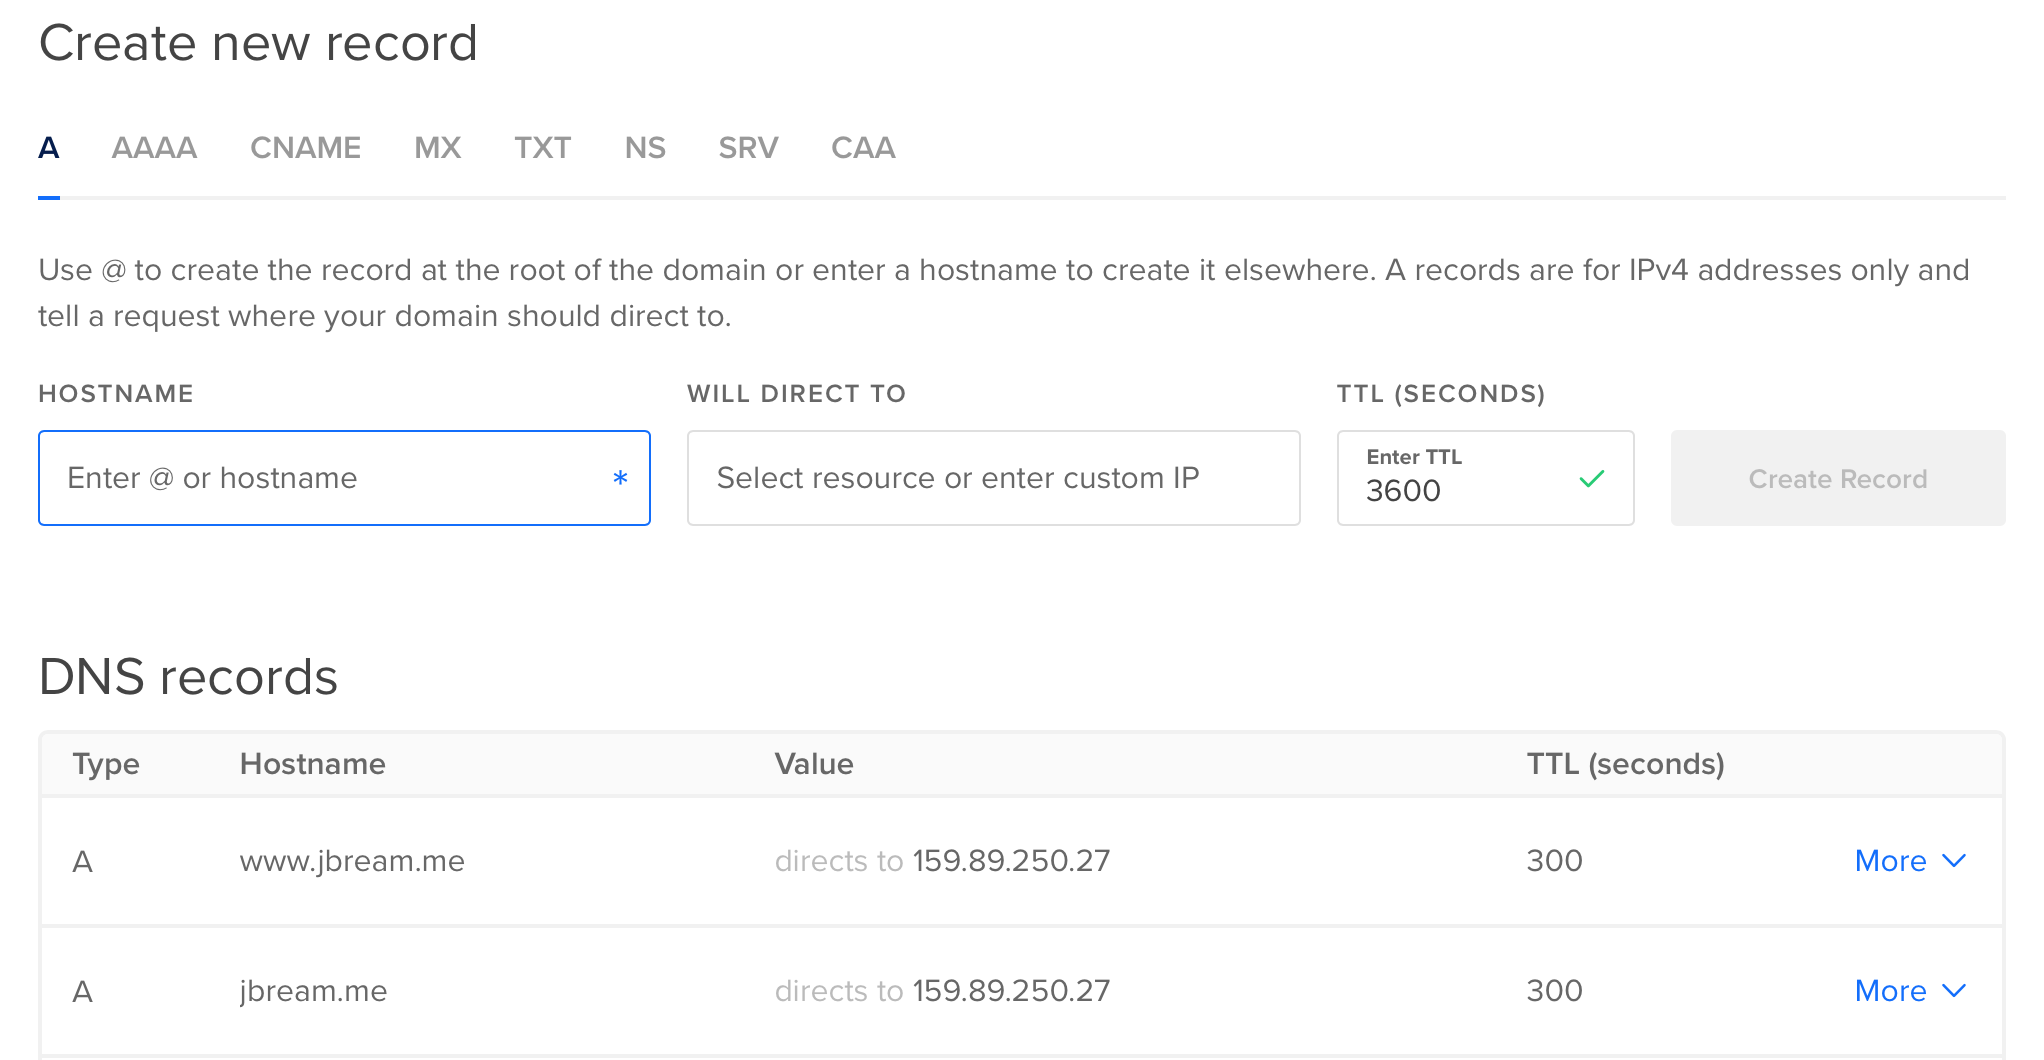
Step 1 is to make sure that you have A records set up for both domains with your DNS provider. It doesn't matter if you're using a subdomain of an existing domain (e.g. www.mydomain.com) or you're using a completely seperate domain (e.g. myotherdomain.com), the process is the same. I make use of DigitalOcean's DNS management so here's how I've got mine set up:
Side note: if you're using DigitalOcean, I'd highly recommend setting up a floating IP if you haven't already. You'll thank me down the line!
Once you've got both IP addresses configured, it can take a little while for this change to propagate so it might be apt to go make a cup of tea/coffee.
Configuring the new URL in Ghost
With your DNS set up, the next step is to tell Ghost about the new domain and (optionally) set up SSL - which you really ought to be doing!
Get a shell on the server that your ghost blog is running on, navigate to the ghost install directory (by default /var/www/ghost) and run the following two commands to add the new URL. In this example I'm adding a www subdomain.
Not using SSL🔓
ghost config url http://www.mydomain.com

ghost setup nginx
If you want to use the original domain as your main one, make sure to re-run the config url command with the original domain to set it back.
ghost config url http://mydomain.comYou'll now have an NGINX config for the new domain so skip ahead to the 'Configuring the redirect' section below.
Using SSL 🔒
ghost config url https://www.mydomain.com

ghost setup nginx ssl
Follow the LetsEncrypt instructions and you should quickly receive a success message when your new certificate is in place.
If you want to use the original domain as your main one, make sure to re-run the config url command with the original domain to set it back.
ghost config url https://mydomain.com
Configuring the Redirect 🚧🚗
You've got some NGINX config in place for both URLs now, so it's just a case of adding a redirect on the one you don't want to use.
Ensure you're still in your ghost blog directory (e.g. /var/www/ghost) and navigate to system/files where you'll find at least two .conf files pertaining to your URLs. If you've used SSL there'll be two for each domain.
Open up the file corresponding with the URL or domain you don't want to use as your main URL (e.g. www.mydomain.com.conf) and remove entirely the first block that will look something like the following:
    location / {
        proxy_set_header X-Forwarded-For $proxy_add_x_forwarded_for;
        proxy_set_header X-Forwarded-Proto $scheme;
        proxy_set_header X-Real-IP $remote_addr;
        proxy_set_header Host $http_host;
        proxy_pass http://127.0.0.1:2368;

    }
Ensure you leave the .well-known block as it was. Right at the bottom of this file just before the final closing } add a redirect command to seamlessly redirect visitors from the old URL to the new one:
return 301 https://mydomain.com$request_uri;If you're using SSL you'll now need to repeat this step for your second SSL .conf file.
Verify. Restart. Profit? 🔌👌
Finally, let's use NGINX's config verifier to make sure we haven't broken anything before we push this new config live (no one wants a broken website).
sudo nginx -tOnce you're happy to do so, push the change live by reloading NGINX.
sudo nginx -s reloadHopefully, you should now be able to test the redirect in your browser. If it worked, congrats! If it didn't, go back through the steps carefully and if you're still stuck, tweet me @JamesWBream on Twitter and I'll see if I can lend a hand!